Add Facebook Messenger Live Chat to Blogger with AMP
How to Add Facebook Messenger Chat Box to Blogger (Valid AMP)? Step by step how to add facebook customer chat widget
Cara Menambahkan Widget Facebook Live Customer Chat di Blogger AMP
Note:
This tutorial only for blogger who have Facebook Page/Facebook fanspage. And domain have SSL / https.
Facebook is one of the most successful and most used social networking platforms in the world. Every day, millions of people in the world use facebook for various needs. Starting from for entertainment and business. This is also what makes facebook a business area for many people, including the Bloggers who often use Facebook as a third party.
The number of website activists in using facebook is what encourages the Facebook party trying to develop its API through Facebook Developer..
And lately, facebook has inaugurated one of the latest Facebook Developer features that bloggers can use for free.
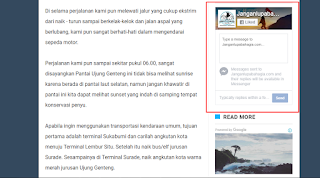
"Messenger Customer Chat (Beta)", is one of the new features of developers that allows website developers to put facebook messenger widgets on their websites and blogs.
The question is, whether Facebook Customer Chat can be used on the Google AMP page? Can it be installed on AMP blogger? Of course! Here's how to add facebook live chat to blogger AMP:
The number of website activists in using facebook is what encourages the Facebook party trying to develop its API through Facebook Developer..
And lately, facebook has inaugurated one of the latest Facebook Developer features that bloggers can use for free.
"Messenger Customer Chat (Beta)", is one of the new features of developers that allows website developers to put facebook messenger widgets on their websites and blogs.
The question is, whether Facebook Customer Chat can be used on the Google AMP page? Can it be installed on AMP blogger? Of course! Here's how to add facebook live chat to blogger AMP:
Setup Widget Facebook Messenger Chat
Please note that this tutorial only applies to those of you who have Facebook fanpage and already have
Facebook Apps ID. If you do not already have an Apps id, please register first at https://developer.facebook.com. And also keep in mind that your blog domain already support SSL / https.
If the 2 basic requirements are already met, just access your Facebook fanspage dashboard.
The first step, click Settings on the fanpage dashboard page. Then in the left bar, click Messenger Platforms .
Next, please input the APPS facebook developer ID you created earlier in the "Link your app to your Page" field then click Link.
Next input your blog domain in "Whitelist domain" and click save.
The first stage is complete, go to the final stage of installation.
Installing Customer Live Chat Widget on Blogger Valid AMP
After you finish setting up your Facebook Chat Customer, now live the final stage that is put on your blogger sidebar.
On blogger.com go directly to layout then click add widget. To add the new widget, select HTML.
Paste this code:
<amp-iframe width="250"

      height="300"

      sandbox="allow-forms allow-scripts allow-same-origin allow-modals allow-popups"

      frameborder="0"

      scrolling="no"

      src="https://www.facebook.com/plugins/page.php?href=https%3A%2F%2Fwww.facebook.com%2Fusername%2F&tabs=messages&width=250&height=300&small_header=true&adapt_container_width=true&hide_cover=false&show_facepile=true&appId=APPID">

  </amp-iframe>
Note:
- Change username with your facebook fanpage id / username.
- Change APPID with the number of facebook developer application you created
For the final stage, please remove the
<b:include name 'quickedit' /> code in your template to avoid errors in your Google AMP blogger's validity.